Showing posts with label bloghop. Show all posts

Wednesday, September 3, 2014

BLOGHOP TIME: See You In September!

It's SPRING! *runs around like a little chickadee in season-warming glee*

Down here in Australia, it's the 1st September, and therefore also the first day of Spring. (Equinoxes, schmeequinoxes. We count the seasons by date, none of your planetary motions and solar proximities biz, thank youp!) And the weather here in Sydney has kindly taken on a lovely spring tinge. It will doubtless rethink this as September progresses, but for the moment, it's all happy and delightful and glowy.

And particularly because I HAS A HOUSE! SO HOUSE! MUCH EXCITE!


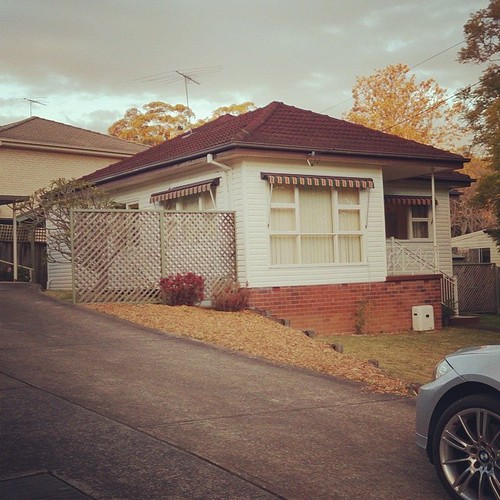
My sister and I bought a property together in suburbia. It's a lot smaller than our current residence (which we share with our youngest sister), so it's going to be a bit of a squeeze to get everything in there. And yes, I have a quilting workroom - although I'll be sharing it with my sister, half-half, so it will get rather squeezy in there at times.

Still, it's OUR HOUSE!

With a yard! A flat yard! That I can grow things in! (Since it's spring.) FRUIT TREES.

But you're not reading this blog for that. *coughs*


Madam Samm of SEW We Quilt runs regular bloghops, full of quilters, their links, and their creative outputs, and this one was run over the Northern Hemisphere summer with a fairly simple fiat: create three things, one of them with Riley Blake Designs Gingham. Be as creative as you want!

So, this winter (Southern Hemisphere) I made...uh...quilts. More quilts!

I know, it's not very creative in the 'expanding out of my comfort zone' way, but I haven't really had time to experiment very much in the last few months. I hope I will in the coming months, though!

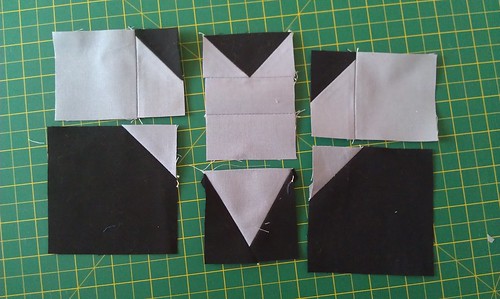
Batik Bitsa Cushion Covers

I've had the fabric for these for a long time, but never actually got around to putting it all together.

See You In September

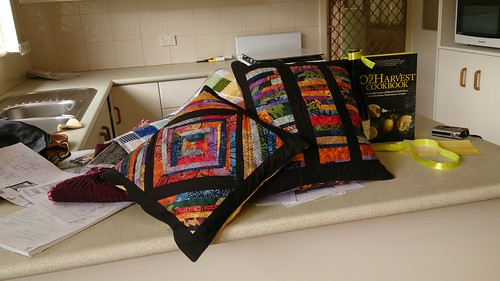
The first two cushions are made from off-cuts from the batik quilt which has been sitting on my bed for several years now. Their framing is (unfortunately) some polycotton that I thought would be good enough for making things out of. Note to self: polycotton cannot take the heat (of the iron) and should stay out of the sewing room!

They're small cushions - only 14"-15" - and will probably just lay around on my bed, being co-opted by the cats.

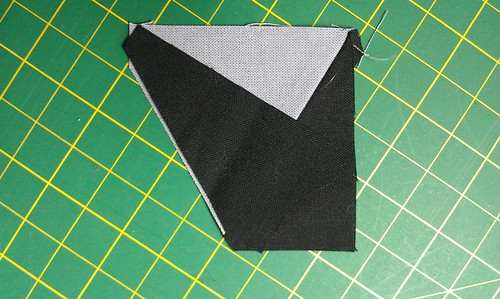
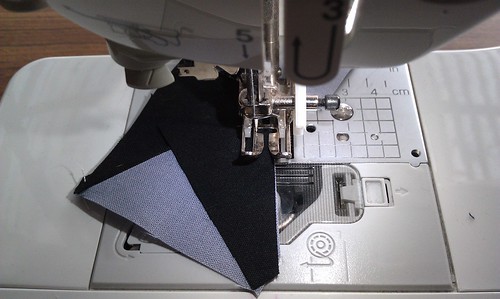
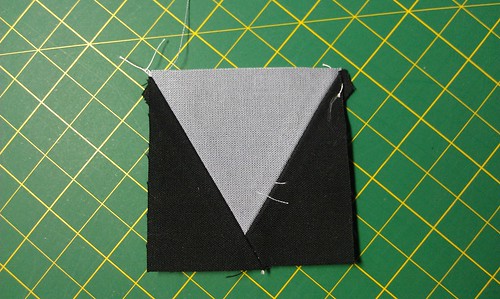
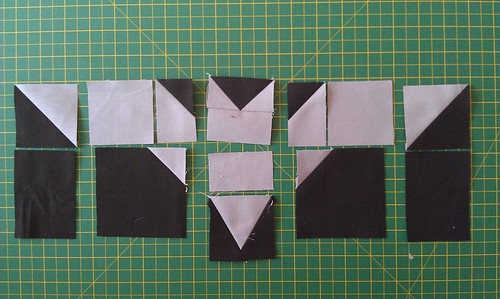
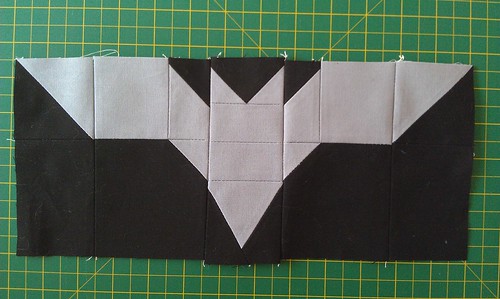
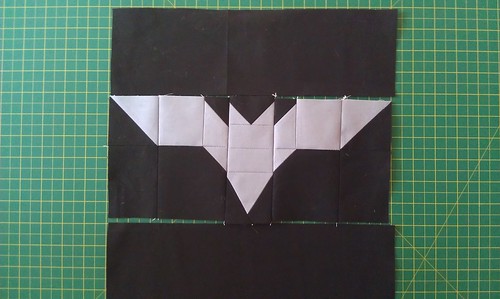
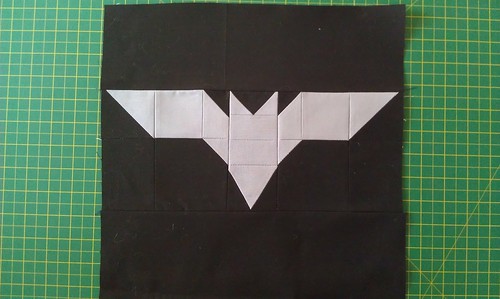
Snowflake Blossom Cushion Covers

The second two are from a pattern that I worked out a couple of years ago, and which I never managed to incorporate into a full-sized quilt - the Snowflake Block.

#snowflakeblock cushion cover #1 done! I like the "winter wind" quilting I did.

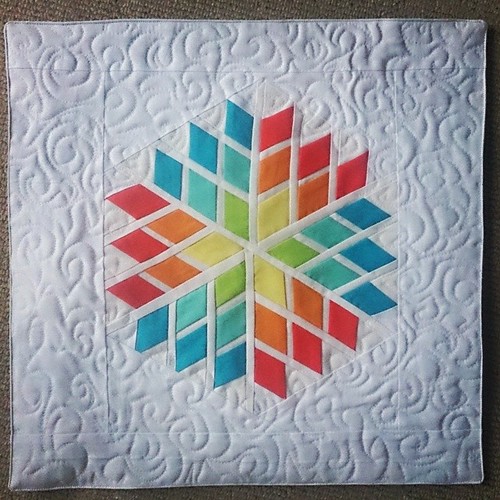
Looks pretty spectacular, doesn't it?

Looks even more spectacular with some colourful backdrop:

SeaBreezeMQAL

My sister's comment when she saw them was: "Are they for us?" Namely, were we going to get to keep them (rather than them being farmed out as gifts). Yes, they're for us. :)

Sea Breeze Mini

The Sea Breeze Mini Quilt pattern was developed by Megan of Canoe Ridge Creations, and when fellow Australian GnomeAngel asked for volunteers to participate in a bloghop, I figured 'oh, why not' in spite of the fact that work is crazy, house is crazy, and winter is always an exhausting time for me.

Yes, I have a problem with overcommitting.

Many wonderful artists joined in with the bloghop and quilt-along, and if you haven't seen them, I recommend a quick hop over to GnomeAngel's blog and the Sea Breeze MIni QAL to see how it all went!

My day to blog about the #seabreezemqal! It's all choppy seas and storm clouds, but there's clear skies coming, I'm sure!

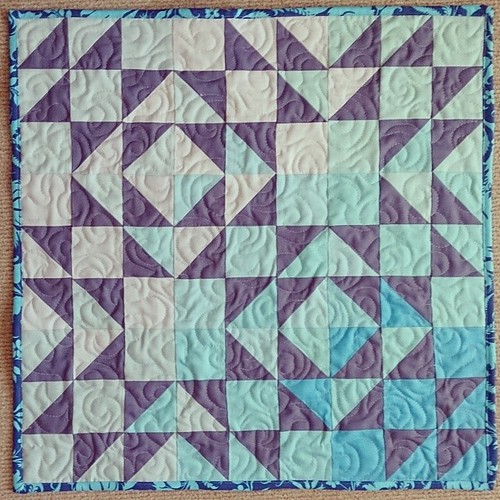
I'm pretty happy with my resultant mini...even if I have no idea what I'm going to do with it now...
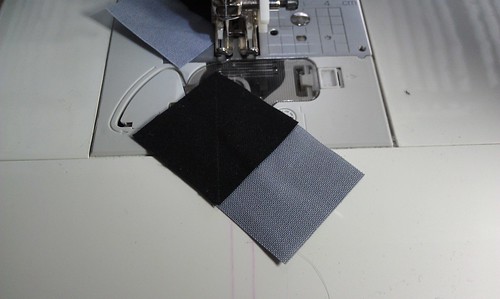
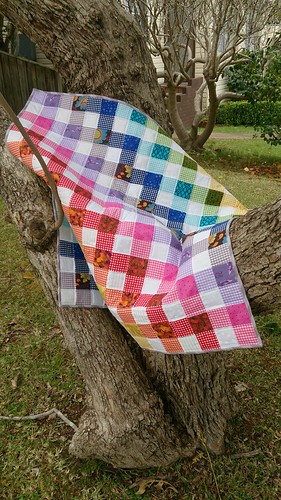
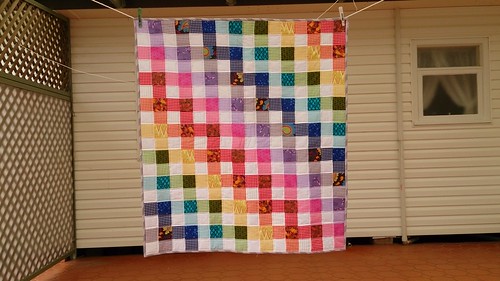
The Gingham Quilt

I know, dreadfully unoriginal name for it!

See You In September

I admit, I didn't read the requirements for this bloghop very well. I completely missed the whole bit about one project having to include RBD Gingham. And than I was horrified: GINGHAM?!?!?

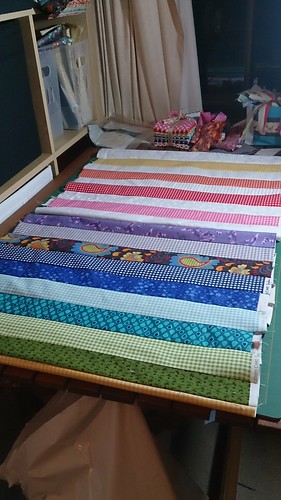
After a few moments and a bit of searching on the intarwebs, I found a little roll of RBD gingham in rainbow colours. And a little imp suggested: "Why not make a gingham quilt out of gingham?"

I can't believe, it's not-gingham!

Part of the due inspiration for this goes to La Madame Samm herself, who painted her room gingham and showed us the process. The idea that gingham could be more than just a fabric weave was something I'd never considered before. (I'm afraid I don't usually spend my days contemplating gingham in all it's monochrome glory.)

I can't believe, it's not-gingham!

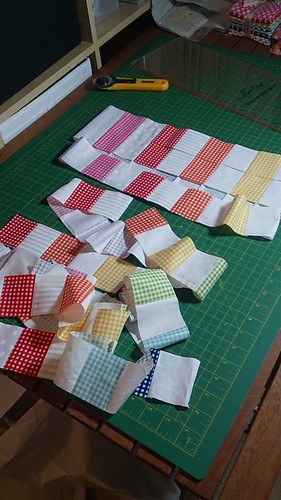
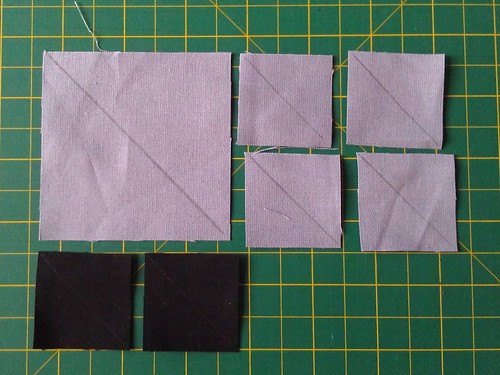
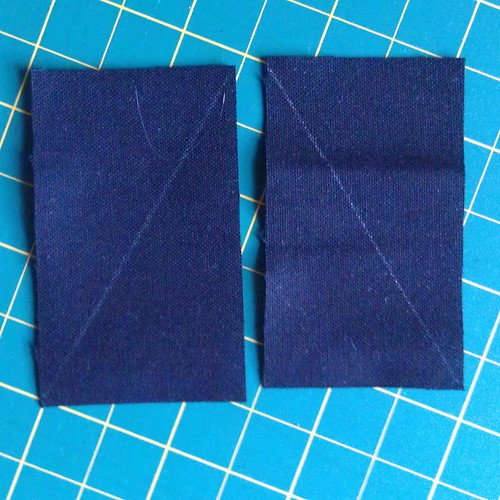
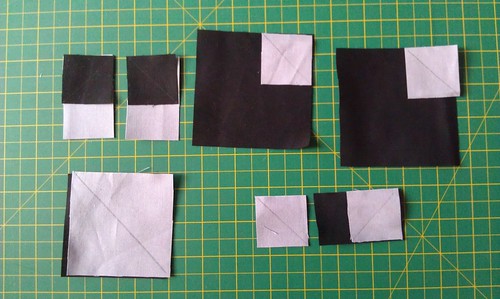
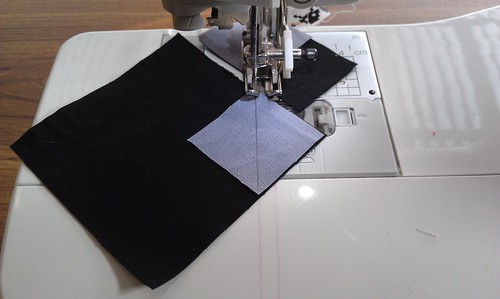
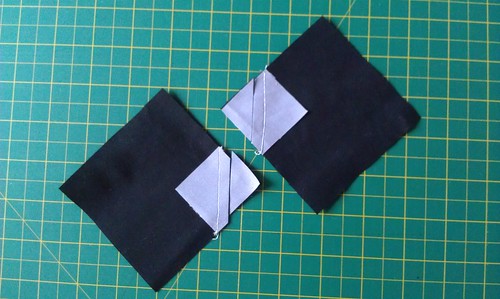
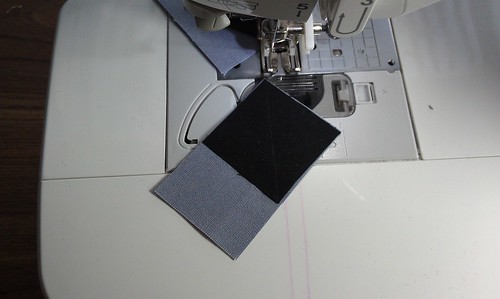
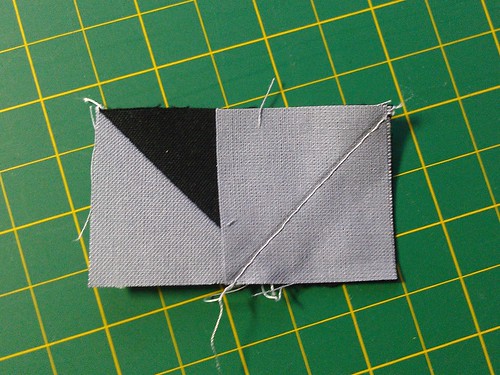
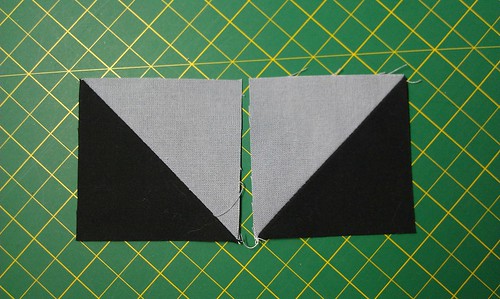
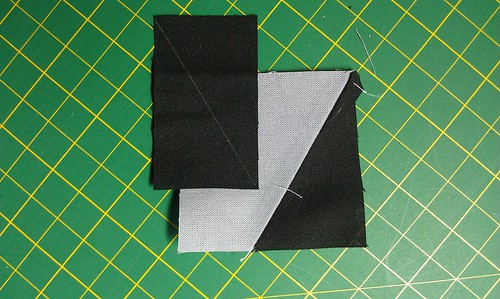
I worked out that the gingham pattern was nothing more than an endlessly repeating four-patch with one solid square, one white square, and two half-half squares, where the two half-half squares are always set diagonally from each other in the four-patch. The colours themselves are less important than the value difference between the fabrics.

I can't believe, it's not-gingham!

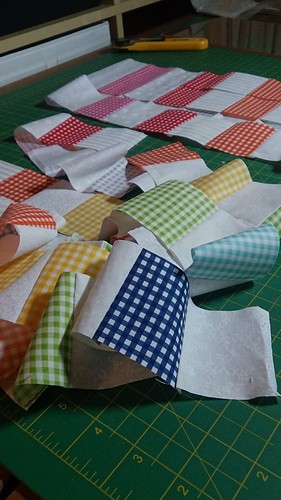
So rainbow gingham, rainbow prints (rather than solids), and white prints gets you a gingham quilt!

Sunny inside, rainy outside...

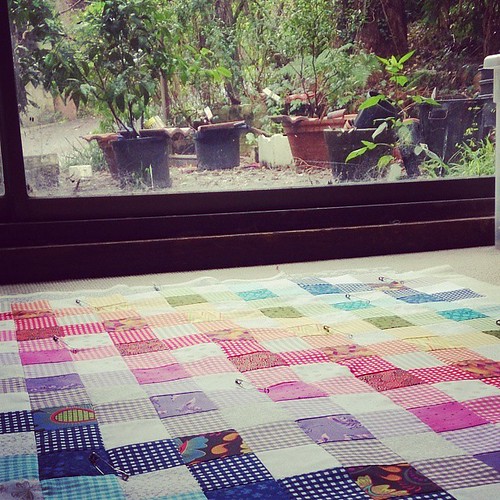
I rather like it in the pretty rainbow colours. And in the setting of my new house!

See You In September

So that's my post for the See You In September Bloghop! I hope you go check out some of the other posts from today and all the rest of the blog hop!

Wednesday, September 3

Sew Incredibly Crazy
Bumbleberry Cottage
Thimblemouse and Spouse
In The Boon Docks

Go wander, check out, leave comments, and generally admire the lovely projects (gingham and other) that us fabulous quilting ladies have done!

Sunday, October 21, 2012

Welcome to the WICKED blog hop!

For the next 9 days there'll be a blog hop with Hallowe'en themed blocks and giveaways all over the blogosphere.

Wickedly Mournful Monday - 22nd of October
The Quilting Alleycat
Words & Stitches
Geema's Wonderings
Quilt Doodle Doodles
Bacon Then Eggs
Inga
Briarside Lane
Quilts And Smily Faces
Why Knot?
Quilt Matters
Mad Quilter's Disease
Susie's World
Sew Paint Create

In my case, I have a tutorial for a 12½" (unfinished) bat block!

Bat block

Wicked: Bat Logo Block

This started life as the logo from the recent Batman movies, but has since morphed somewhat to this:

Wicked: Bat Block

You Will Need:
Colour 1 (Bat)
(In my example, it's grey.)
1 - 3" x 3"
3 - 2½" x 2½"
4 - 2½" x 1½"
4 - 1½" x 1½"

Colour 2 (Background)
(In my example, it's black.)
1 - 3" x 3"
2 - 3½" x 3½"
2 - 1½" x 1½"
3 - 1½" x 2½"
2 - 3½" x 2½"
1 - 3½" x 12½"
1 - 4½" x 12½"

IMAG1728

Step 1: marking

Take a pencil or washable marker, and draw a line down the diagonals of:

1 Bat-colour square 3" x 3"
4 Bat-colour squares 1½" x 1½"
2 Background-colour squares 1½" x 1½"

IMAG1730

Also draw a line down the diagonals of the 2 Background-colour rectangles 2½" x 1½", but make sure one runs from top right corner to lower left corner, and the other runs from top left corner to lower right corner.

IMAG1734

Step 2: sewing the units together

IMAG1731

(a). Take the 2 Background-colour squares 3½" x 3½" and place 2 Bat-colour squares 1½" x 1½" in the top right corner as shown in the picture, matching the edges.

(b). Take 2 Bat-colour rectangles 1½" x 2½" and place the 2 Background-colour square 1½" x 1½" at the top of them, ensuring one pencilled diagonal runs top right corner to bottom left corner, while the other runs top left corner to bottom right corner as shown in the picture matching the edges.

(c). Take 2 Bat-colour squares 1½" x 1½" and lay one of them down on the Background-colour rectangle 2½" x 1½", with the diagonal running top right corner to bottom left corner as shown in the picture, matching the edges.

(d). Take the Bat-colour square 3½" x 3½" and lay it on top of the Background-colour square 3½" x 3½" as shown in the picture, matching the edges.

Sew on the pencilled line for (a), (b), and (c). Do not sew (d) yet!

(a)

IMAG1732

Lay your ruler down ¼" from the seam, and cut off the small corner:

IMAG1733

Press seams open.

(b)

IMAG1740

Lay your ruler down ¼" from the seam and cut off the small corner. Press seams open.

IMAG1741

Lay your ruler down ¼" from the seam and cut off the small corner. Press seams open.

(c).
You should have sewn just the first Bat-colour square on the Background-colour rectangle.

Lay your ruler down ¼" from the seam and cut off the small corner. Press seams open.

Then lay down the second Bat-colour square at the other end of the Background-colour rectangle, making sure that the pencilled line forms a 'V' with the seam. Sew on the pencilled line.

IMAG1739

Lay your ruler down ¼" from the seam and cut off the small corner. Press seams open.

Now we're going to deal with (d).

(d).
Sew the seams ¼" either side of the pencilled line:

IMAG1748

Lay your ruler down on the pencilled line and cut in half. Press seams open.

Trim your half-square triangle units into to 2½" squares.

IMAG1752

(e).

Remember those two Background-colour 1½" x 2½" rectangles with the diagonals on them?

Take the Background-colour rectangle with the diagonal running from the top right corner to the bottom left corner and lay it on the right side of one of Bat-colour 2½" x 2½" squares.

DO NOT SEW IT.

First, take your ruler and lay it down ¼" from the pencilled line and cut off the small corner.

Then, take the Background-colour rectangle, rotate it upside-down, and flip it over so the 'thin' end of the triangle is at the top of the unit.

NOTE: If you haven't used a solid, as I have, you'll have to cut the opposite side before sewing it, so you get the right sides of the fabric together. Read to the end of the section and it will become clearer.

Sew the seam ¼" from the edge of the fabric. Press seams open.

Now, take the other Background-colour rectangle with the diagonal running from the top left corner to the bottom right corner and lay it on the left side of the unit.

IMAG1742

Take your ruler and lay it down ¼" from the pencilled line, cutting off the small corner.

IMAG1744

Then take the Background-colour rectangle, rotate it upside-down, and flip it over so the 'thin' end of the triangle is at the top of the unit.

IMAG1746

Sew the seam ¼" from the edge of the fabric and press the seams open.

IMAG1747

IMAG1750

Now you have all the units ready for assembly!

Step 3: Sewing the block together.

I recommend laying all the pieces out so you can see how everything goes together:

IMAG1757

I sewed the 'wing' units together, and attached the 'bat ears' to the 'head' and 'body' units to start with.

IMAG1758

Then sew the backgrounds onto the 'wingtip' units.

IMAG1759

Then sew all the vertical seams.

IMAG1760

Don't forget to sew ¼" seams all the way!

IMAG1761

Add the top and the bottom pieces and we're done!

IMAG1762

One bat block 12½" x 12½", suitable for that wonderfully WICKED Halloween quilt or cushion!

Thanks so much for coming by, and I hope that you've enjoyed the WICKED blog hop! Don't forget to drop by the other blogs and check out their tutorials and giveaways!

I don't usually do much for Hallowe'en - living in Australia, it barely makes a peep on our holiday radar. However, in the last couple of years I have acquired an American friend in Penny Poppleton who enjoys throwing a party right around Halloween, complete with decorations and dress-ups. So, come Saturday night, I'll be putting on a costume and heading off to Penny's house! There probably won't be any trick-or-treating, but we're going to have a great time all the same!

What are you doing for Hallowe'en? Do you do anything at all?