Studio Mio (West Chatswood) leather and vinyl bag handles
Tall Poppy Craft (New York and Sydney, apparently!): leather and vinyl bag handles
Voodoo Rabbit (Brisbane): like their silver O-rings

Showing posts with label accessories. Show all posts
Showing posts with label accessories. Show all posts
Thursday, December 11, 2014
Friday, February 17, 2012
Finish Friday: The Laptop Cover That Did!
Laptop Cover Ahoy!

All finished! The Garden Gate fabric is the perfect size for the cover, and the keys fabric makes a lovely inside lining!
Book: Cassie Barden's "The New Handmade"
Pattern: Laptop Cover
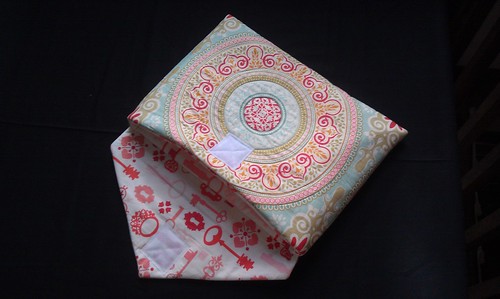
I quilted this cover, following the circles of the pattern to add a bit of texture to the surface. I think it looks pretty good - and the extra quilting holds it together just that little bit better when you're sewing everything together.
Once the calculations were done, the cutting was pretty simple, and putting together the pieces of the whole - inside lining, outside sleeve, and flap closure - was easy enough.
The tricksy part came when setting everything up to sew together. For at least half the final seam - the one seam where the lining meets the outer sleeve and the flap - your needle is going through around 10-15 layers of fabric, batting, and interfacing. That's a lot of layers!
On the plus side, it does provide the laptop with a lot of padding protection!

However, it's advisable to be careful to pinning everything together. While sewing the 'original' cover (the blue-green one, a.k.a. "TARDIS"), I screwed up one of the seams...
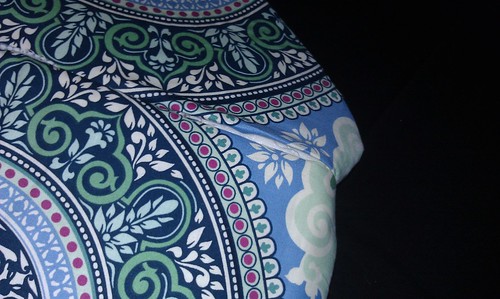
Guess I have a date with my unpicker. Or a needle.
I also made a boo-boo with the flap of the red cover: the pattern doesn't 'match' the line of the cover underneath it.

Still, it's functional, it's rather pretty and it's great to have a laptop cover again!

Now to make a cover/case for my e-Reader...
All finished! The Garden Gate fabric is the perfect size for the cover, and the keys fabric makes a lovely inside lining!
Book: Cassie Barden's "The New Handmade"
Pattern: Laptop Cover
I quilted this cover, following the circles of the pattern to add a bit of texture to the surface. I think it looks pretty good - and the extra quilting holds it together just that little bit better when you're sewing everything together.
Once the calculations were done, the cutting was pretty simple, and putting together the pieces of the whole - inside lining, outside sleeve, and flap closure - was easy enough.
The tricksy part came when setting everything up to sew together. For at least half the final seam - the one seam where the lining meets the outer sleeve and the flap - your needle is going through around 10-15 layers of fabric, batting, and interfacing. That's a lot of layers!
On the plus side, it does provide the laptop with a lot of padding protection!
However, it's advisable to be careful to pinning everything together. While sewing the 'original' cover (the blue-green one, a.k.a. "TARDIS"), I screwed up one of the seams...
Guess I have a date with my unpicker. Or a needle.
I also made a boo-boo with the flap of the red cover: the pattern doesn't 'match' the line of the cover underneath it.
Still, it's functional, it's rather pretty and it's great to have a laptop cover again!
Now to make a cover/case for my e-Reader...
Subscribe to:
Posts (Atom)