
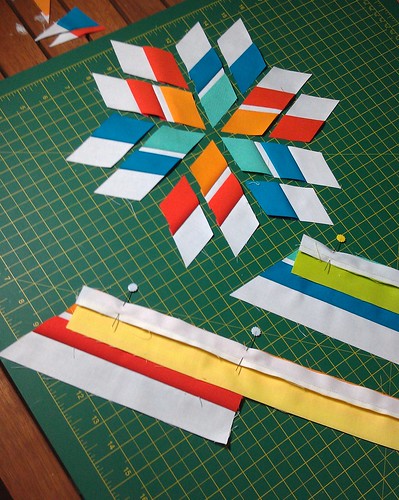
(a.k.a. Rainbow Blossom block)
Designed by Madame Parfait
Tutorial by Sel @ Mad Quilter's Disease
Part 1 | Part 2 | Part 3
Part 1: Cutting and Piecing
You will need
1 FQ of Background Fabric
6x 1½ "x 20" strips in varying colours
(Note: In this case I used a white background with six colours: deep orange, light orange, yellow, green, aquamarine, and turquoise. However, the original 'Rainbow Blossom' block design used only 3, in which case use 1x 'centre colour', 2x 'middle colour' and 3x 'outer colour'.)
Cut the Background colour FQ into:
12x ¾" x 22" strips
3x 1½ " x 22" strips (if you're using only 3 colours, you may need 4 of these)
All seams are ¼" - the more accurate, the better!
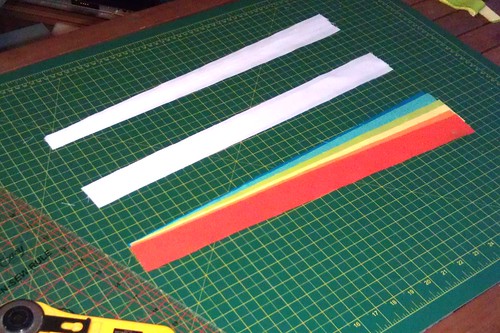
Step One. Decide which colours are going where. With six colours to choose from, I selected three warm and three cool colours, then graded them from lighter (the inner panels) to darker (outer panels).
Take the strips for the outermost colours, and sew each one (good side) together with one 1½" x 22" background strip. Press seams towards the colour side.
Take the strips for the inner colours, and sew each one (good side) together with one ¾" x 22" background strip. Press seams towards the colour side.
It's not necessary, but it helps to keep the colour fabric on the bottom and the background fabric on top, that way you're always sewing the strips to the correct side.
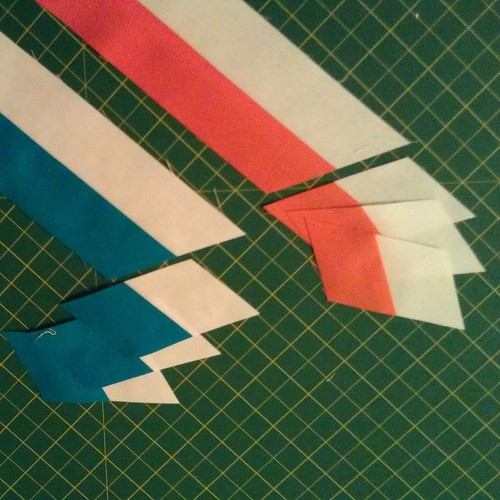
Step Two. Take the outermost colours (sewn to the 1½" wide background strip) and a 60˚ ruler (or rectangular ruler with a 60˚ line) and slice 3x 1½" wide pieces from the one-colour strips:

Put these pieces aside.
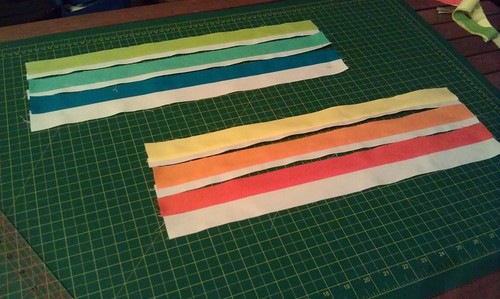
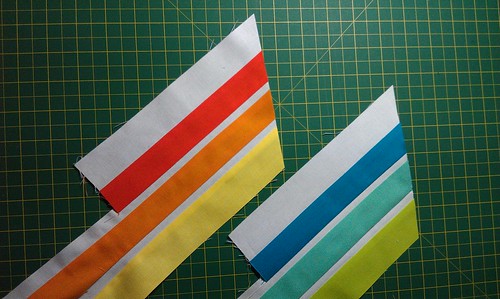
Take the remaining lengths of the outermost colours, and sew each one (good side) together with one of the 2nd tier colours, making sure that the sequence of fabrics is white, colour, white, colour.
Press the new seams towards the colours, too.

Neaten up the left edge of the strip, and slice 3x 1½" wide pieces from the two-colour strips.
Repeat with the innermost colours: sew together, press new seams in same direction as existing seams, cut 3x 1½" wide pieces from the three-colour strips.
Now you should have 18 strips that look pretty much like paint chips!

6 x 1-diamond pieces (3 in warm colours, 3 in cool)
6 x 2-diamond pieces (3 in warm colours, 3 in cool)
6 x 3-diamond pieces (3 in warm colours, 3 in cool)
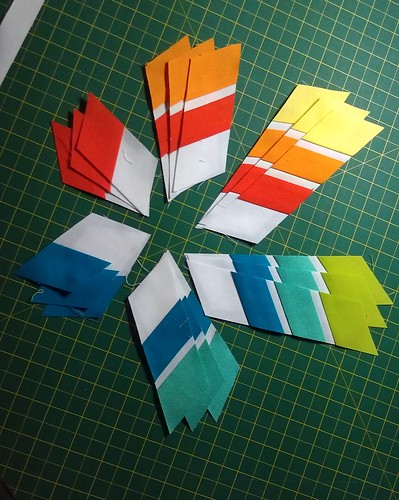
And that's the strip-piecing part done!
I'll post about putting the pieces together on Monday!
If you have any questions, or if I haven't made everything clear, please let me know if the comments and I will do my best to answer them!
Yay! Tutorial :D These look like super-gorgeous paint sample strips at this stage.
ReplyDeleteThanks for this great tutorial! I'm going to be making a block right away as a tester for my Bee block.
ReplyDeleteThanks so much for the tutorial. I can't wait to try this block!
ReplyDeleteGreat tutorial, this is bookmarked for later!
ReplyDeleteI can't wait to finish the snowflake bock -- it's so bright !)
ReplyDeleteHi, what is the finished block size? I have a few ideas for this one. Thanks :)
ReplyDelete