
(a.k.a. Rainbow Blossom block)
Designed by Madame Parfait
Tutorial by Sel @ Mad Quilter's Disease
Part 1 | Part 2 | Part 3
I apologise for the lateness of this tutorial - I know I said I'd post it on Monday, but I spent the weekend making up a second block to check my instructions and it completely fell apart. However, I had no more time to spend to unpick and remake it on the weekend, and the week has been pretty hectic until now! Thanks for bearing with me!
Part 3 Assembling the Block
At the end of the last section, you should've been left with the 6 segments for your snowflake block.
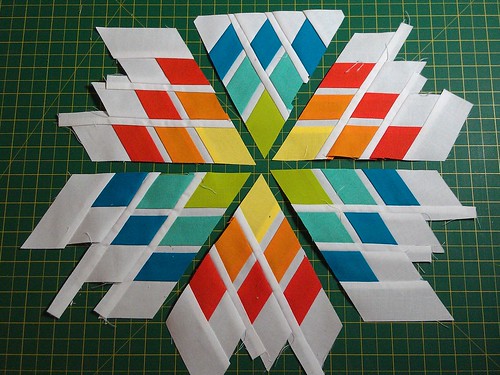
We're going to attach three together for one half, three together for the other half, and then join the two.
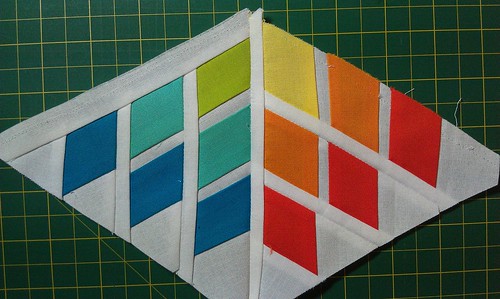
Lay out the pieces in formation, as in the pic above.
Take one of the remaining ¾" strip and lay the bottom centre piece, and the bottom left piece and lay them on top, lining up the edges. Pin and sew.
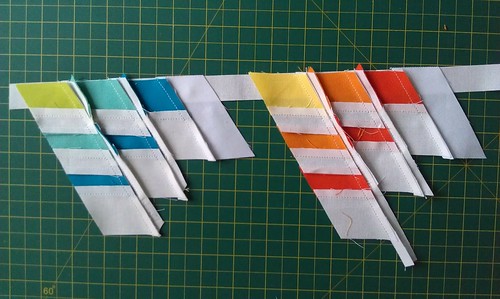
Do the same with the top centre piece and the top right piece.
Press seams towards the white fabric.

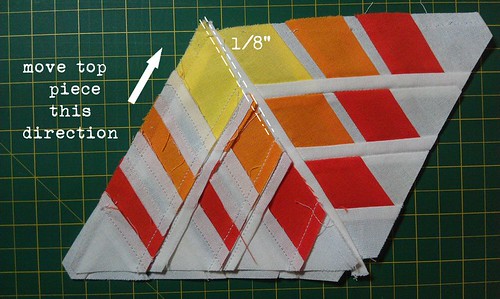
Now, this is where things get a little tricky! We actually want the finished points of the triangle segments to be a bit up or down from each other, which complicates things. I originally designated ⅛", but you might have to do a bit of eyeballing here!
You may also want the unpicker handy! (I certainly needed it: if some of the pics show a row of needleholes...uh, yeah, that's when I had to unpick it all and redo it.)
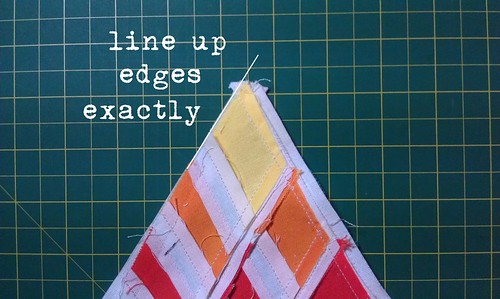
Take the bottom centre piece and the bottom left pieces, and lay them exactly over each other, good sides together.

Line up the sides perfectly:
Now, move the top piece down and to the right (the direction of the arrow) so that the right edges of the segments remain aligned, but the left edges have a ⅛" gap:
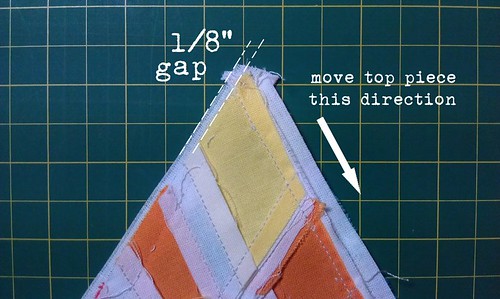
Sew the right-side (aligned) edges together. Press the seams towards the white.
Ideally, if your seams are accurate, the 'branches' off the middle stripe should be at the same level.
As you can tell, my seams are not terribly accurate!
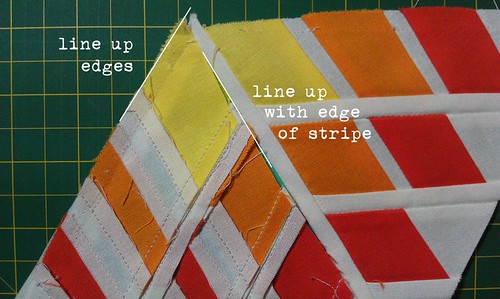
Attaching the bottom left segment is much the same process.

Line up the left side edges and more or less line up the right side with the edge of the white divider stripe. (I say 'more or less' because my segment doesn't have a perfectly straight edge.)
Now move the top piece up and to the right (the direction of the arrow) so that the left edges of the segments remain aligned, but the right edges have a ⅛" gap. It will be harder to see the ⅛" because the line of the divider stripe on the bottom piece will be hidden under the top piece.
Sew the left-side (aligned) edges together and press seams towards the white.
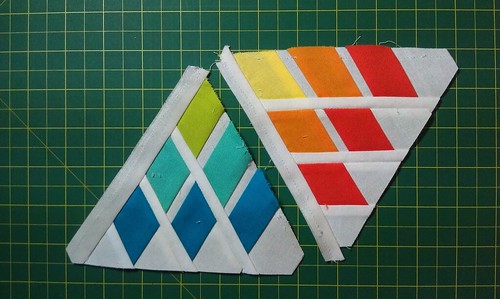
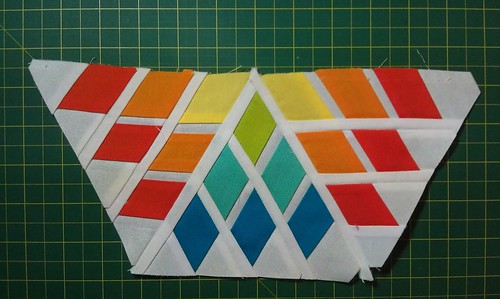
Now you have half a hexagon!
Repeat the process for the three 'top' pieces of the block: simply rotate them so they're now the 'bottom' pieces (points facing up).
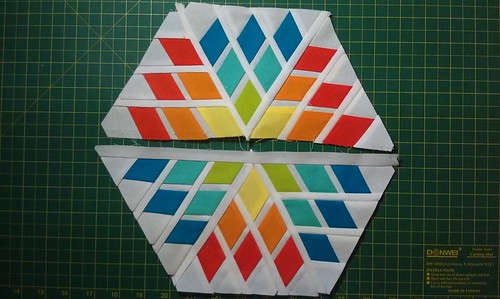
Take the remaining ¾" strip, line up one of the half-hexagons along the edge, sew, and press the seam towards the white.

Take the half-hexagon without the strip, lay it on top of the half-hexagon with the strip, and check that the points are more or less vertically in line with each other. Sew, and press seam to the white.
TA-DA! We're done! One snowflake block, all stunning and ready to go in your next quilt!

Madame Parfait actually made it a square block by adding extra white fabric around the edges, and that's certainly an option. However, I rather like it as a hexagonal block - imagine a whole quilt of these!
You could certainly ‘production line’ quite a few of these if you got yourself organised. I might try it someday when I have a bit more time than right now!
--
I hope that my directions have been clear - if you have any questions, please don't hesitate to ask!
Finally, I've created a Flickr group for all blocks and quilts made from my tutorials. (Okay, so I only have the one at present, but I'm working on it!)
Thanks for this great tutorial.It makes such a pretty block! I'll post my blocks on your Flickr page.
ReplyDelete