(a.k.a. Rainbow Blossom block)
Designed by Madame Parfait
Tutorial by Sel @ Mad Quilter's Disease
Part 1 | Part 2 | Part 3
Part 2: Assembling the Segments
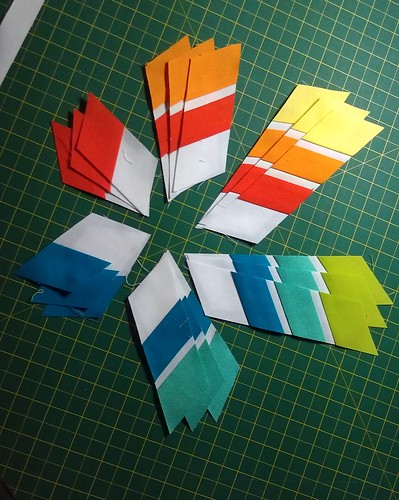
So, at this stage of the block, you should have 18 'paint chip' pieces:
6 x 1-diamond pieces (3 in warm colours, 3 in cool)
6 x 2-diamond pieces (3 in warm colours, 3 in cool)
6 x 3-diamond pieces (3 in warm colours, 3 in cool)
Take the 6x 1-diamond pieces and lay them along the remaining 1½" white strip, lining up the edges, good side down, so close that they're almost touching.
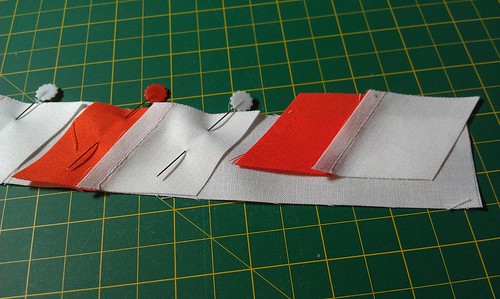
Pin and sew (or just sew and skip the pinning). Press seams towards the white strip.
Lay out the strip, good side up, and cut each 'paint chip' off the white strip. You should have six roughly-diamond shaped pieces, each with a coloured point. (Only five are shown below.)

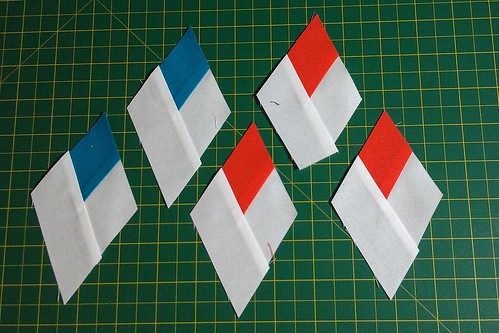
Don't worry if the white sections aren't full diamonds - it's background. Most of it will be cut off when we trim the block down. The coloured block is the important part.
Take the 2-diamond and 3-diamond 'paint chips' and lay them on top of the ¾" background strips, good sides together. Aim to orient them in the same direction that you pointed the 1-diamond pieces on the 1½" white strip. (If you don't, it's not a crisis - it just makes it that much neater)
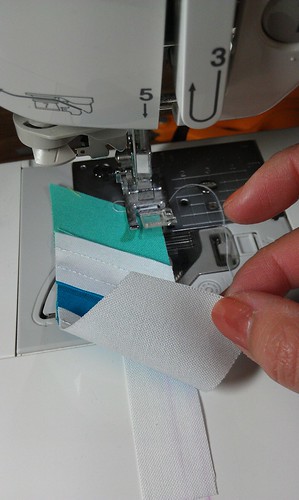
Lay out the strip, good side up. Cut each 'paint chip' off the strip and press the seams towards the white fabric.
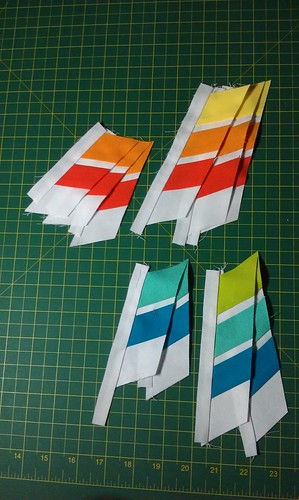
Now for each segment, you should have three 'paint chips' like so:
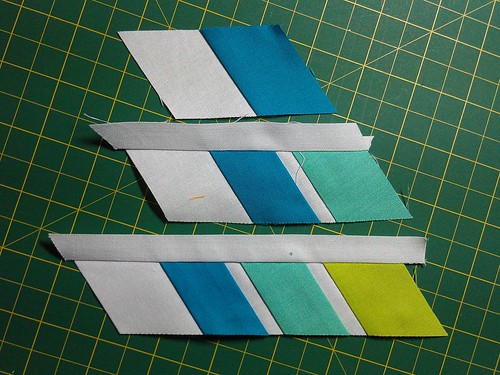
These go together to form a single segment. We make six of these which then assemble into the full block.
This is the part where I found things got a little tricky. In order to get the diamonds to match up, when sewing these together, I found it easiest to line up the diamond points in a straight line, then move the top piece over so the edges were together.
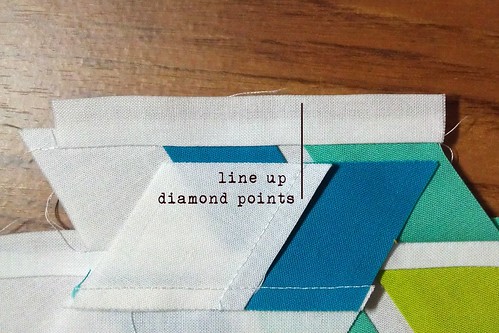
Start with the 3-diamond paint chip and the 2-diamond paint chip:
It might take a bit of pinning and folding back to ensure that your lines are straight! (This is why accurate piecing is A Good Thing!)

This may not be the neatest way of doing it, but it was the only way I could get it lining up. If you can work out a neater way of doing it, don't hesitate to let me know!

This time, press the seams towards the colours. Then repeat with the 1-diamond block, lining it up with the white-strip edge of the 2-diamond block.

Repeat for all six sets of paint chips.
When you're done, you should have six segments like so:
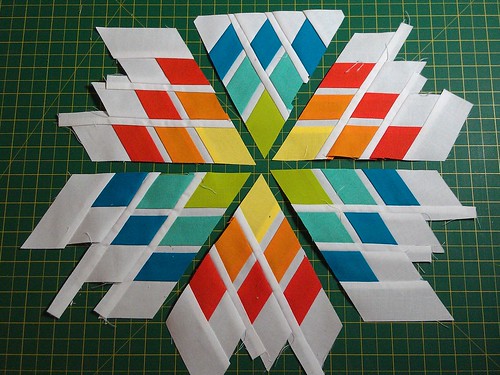
And now it's starting to look like our Snowflake block!
I'll post Part 3 on Wednesday, assuming I don't get bogged down in real life.
If you have any questions, or if I haven't made everything clear, please let me know if the comments and I will do my best to answer them.

Really appreciate you taking the time to do this. :)
ReplyDeleteI'm having fun with this block! Maybe they don't line up quite as well as I would like...practice, practice. Looking forward to seeing my finished block, thank you for a great tutorial!
ReplyDeleteThis is rally on my to do list - may make a Xmas version of it...
ReplyDeleteSomehow my block went wrong! I have room for another wedge! What happened?
ReplyDeleteAwesome block. Could you link to this post from your master post? It's easier for me to keep track of!
ReplyDelete