Showing posts with label snowflake block. Show all posts

Monday, September 19, 2016

Bloggers Quilt Festival: The Promises Of Spring

For the BLoggers Quilt Festival - 2016 Fall Edition, I'm submitting The Promises Of Spring - a quilt with a relatively long tale in my quilting history.

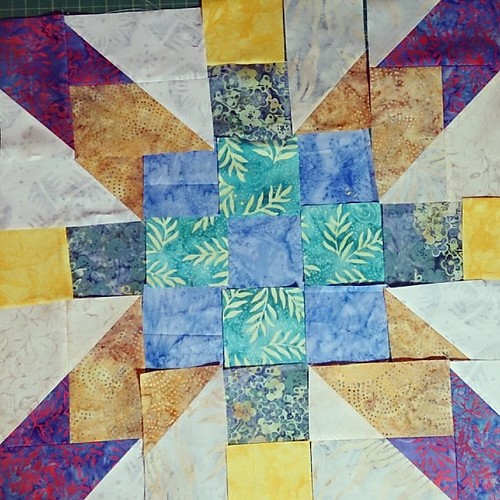
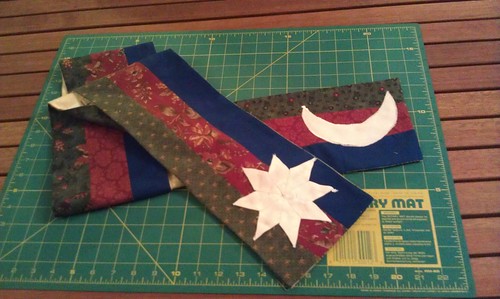
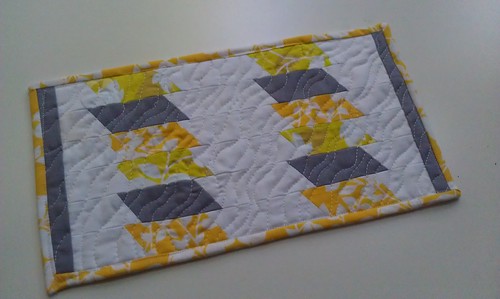
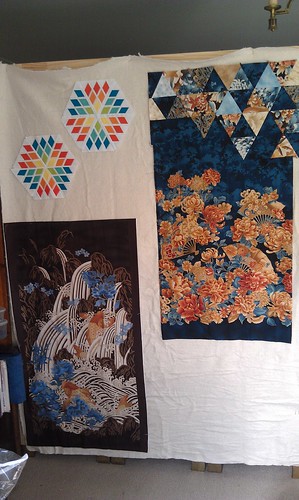
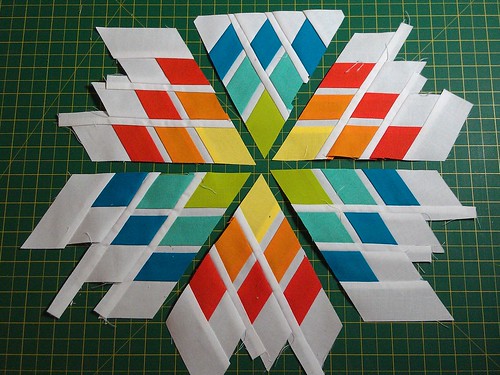
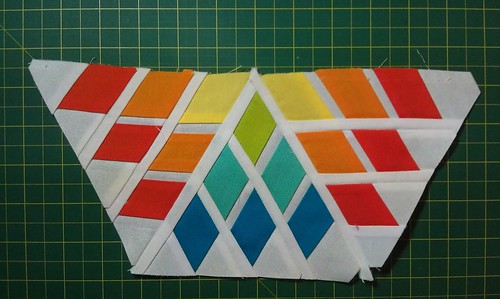
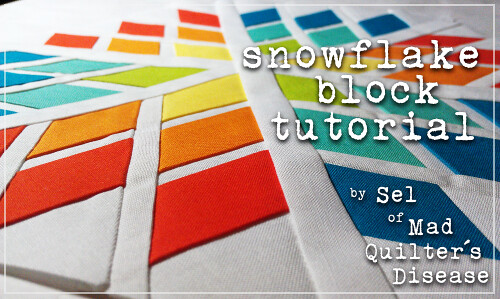
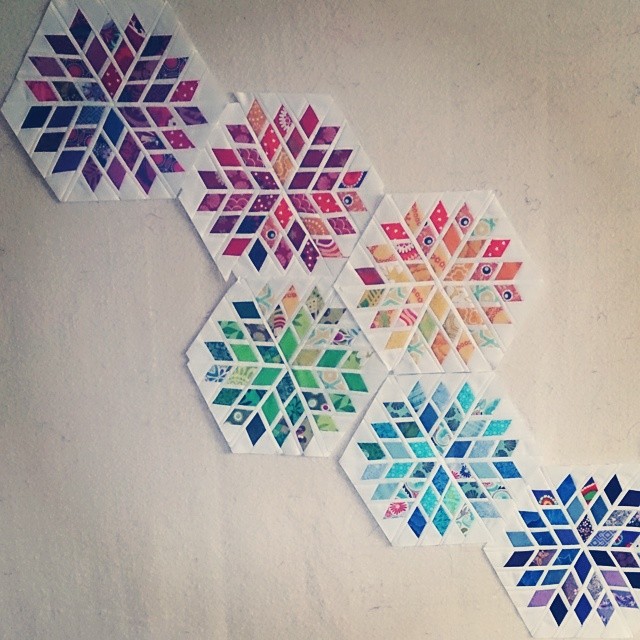
The original block was developed by Madame Parfait (whose site has since lapsed) in 2011, and was brought to my attention by a friend who wanted a pattern for it. So I developed one using strip-piecing, and called it 'The Snowflake Block'.


I did them in the rainbow colouring as per the original, and then didn't know what to do with them. So I made cushion covers, as you do.

SeaBreezeMQAL

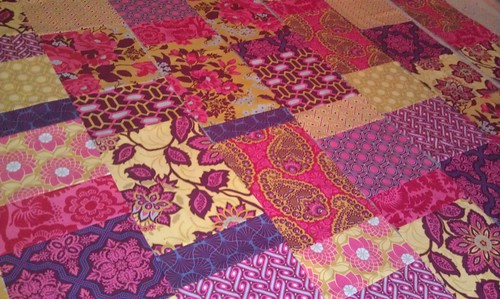
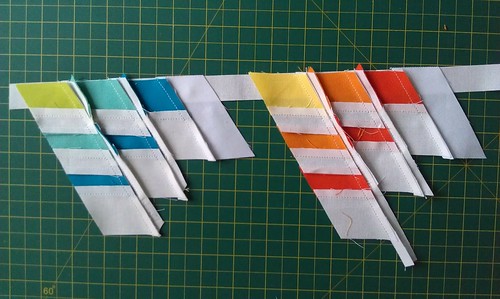
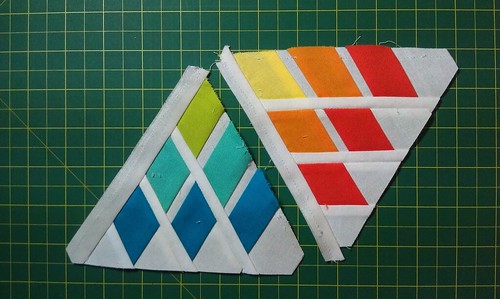
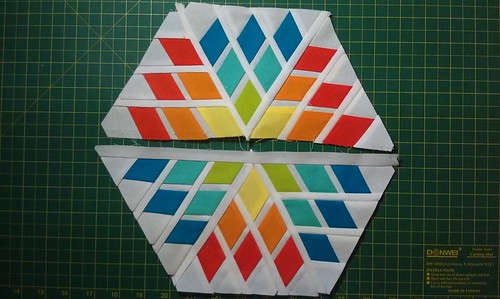
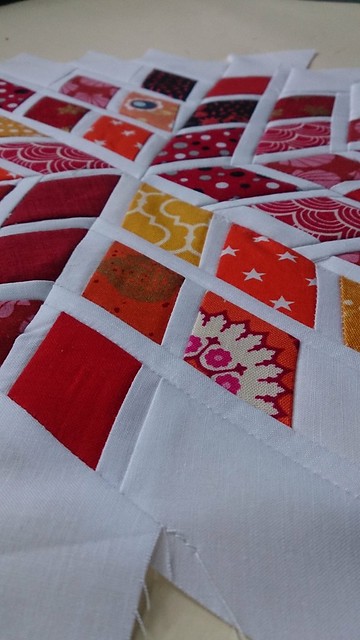
The pattern was pretty popular, but I also found it bloody inconvenient and didn't think it was a particularly fantastic way to do it, as I discovered while trying to piece together another six of them!

DSC_1358

And now it's time for layouts! And working out how to sew the thing together. Y-seams, eek! #snowflakeblock

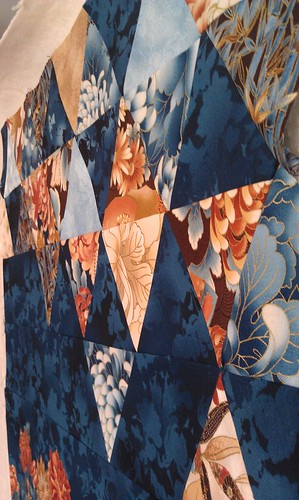
Don't look too closely at those seams...

Snowflakes

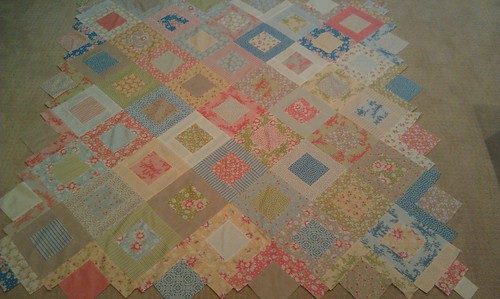
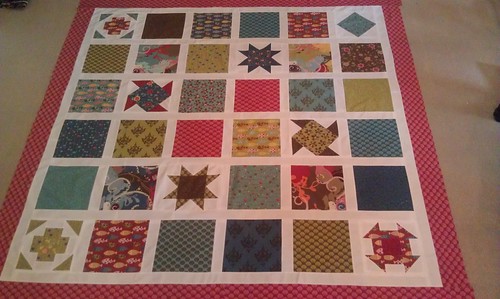
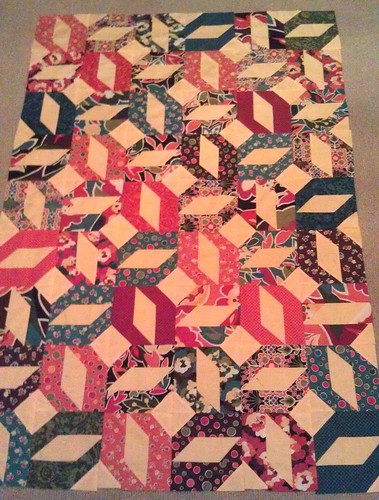
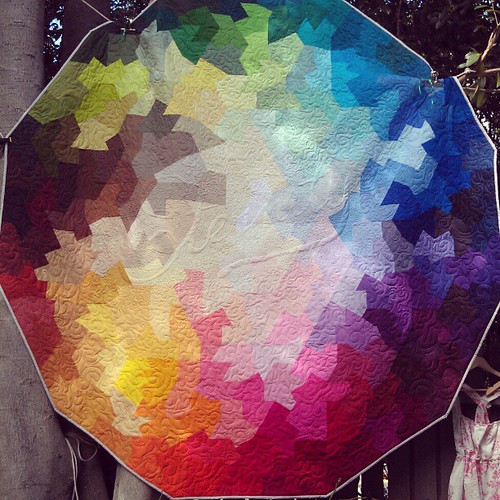
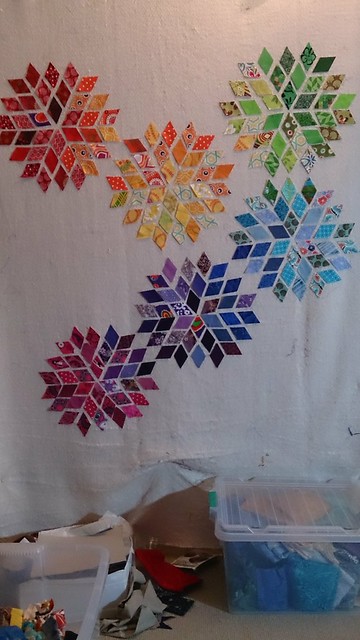
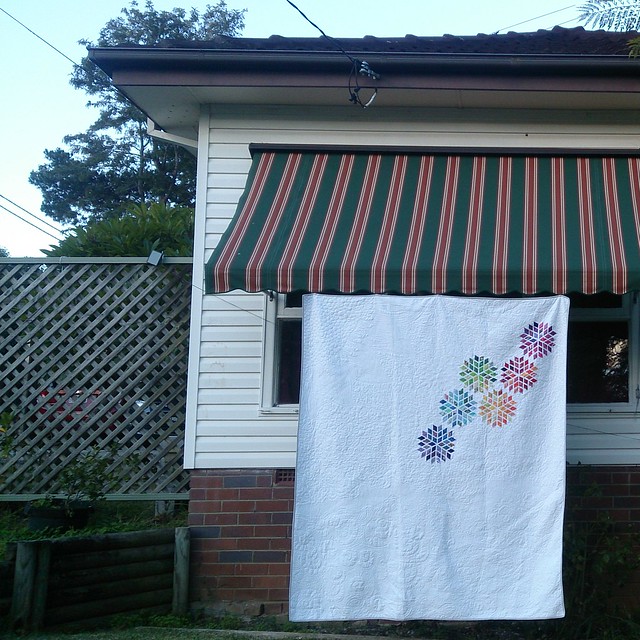
So what do you do with a handful of blocks that you don't want to make more of, but which you don't otherwise have any purpose for? Why, make a quilt with a lot of whitespace in it!

WIP Wednesday: sprint for the show

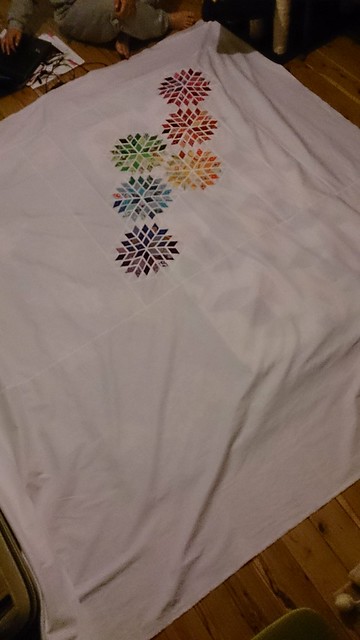
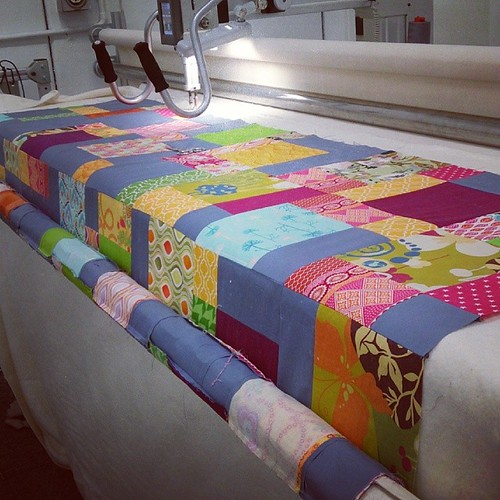
Um, yeah, that's a lot of whitespace. A LOT OF WHITESPACE. But I did quilt it all! ALL OF IT.

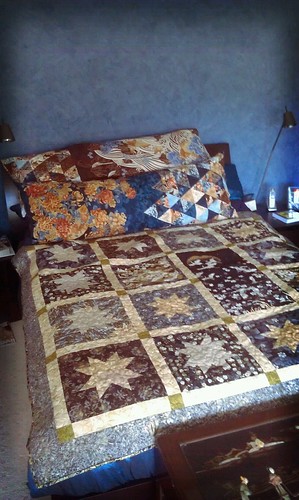
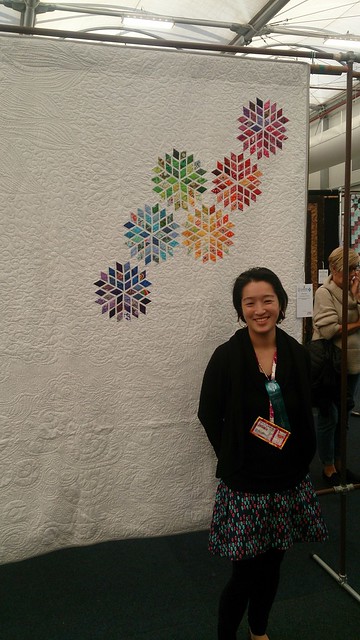
It just turned out to be a year late for the quilt show I'd intended it to be entered in, largely because I did my calf muscle in a week before I planned to book the longarm at the local quilt shop. So it got delayed a year - Sydney Quilt Show 2016! I called it 'The Promises Of Spring' and entered it with the blurb: "Every winter's flake carries the promise of summer within it."

Promises of Spring

The 'regions' of the quilting are ocean deeps, rippling beaches, forest and fern, winter winds, and the sun/flower, and it took me two days to complete.

Quilt Show 2016

In the aftermath of the show, though, a friend expressed an interest in purchasing the quilt for what it was worth, but when I named the price, she wasn't able to pay that much. Note: I valued the quilt at somewhat less what it had cost me in time and materials to make, plus 10% profit. Frankly, the hours I put in were probably two or three times that, given that I was piecing the snowflakes diamond by diamond. But that was the cost I named, although I admitted I was willing to accept a lower price.

While the friend was thinking it over, another friend was browsing through my feed and decided she liked it and would pay the price in question - and actually asked if it wasn't a bit low. She does costumes herself, so she knows both the cost of crafting something like this, and tendency of makers to undervalue themselves. I was more than happy to sell at the named price, and she received it a couple of weeks ago and is delighted.

Promises of Spring
Quilt Measurements: 180cm x 200cm
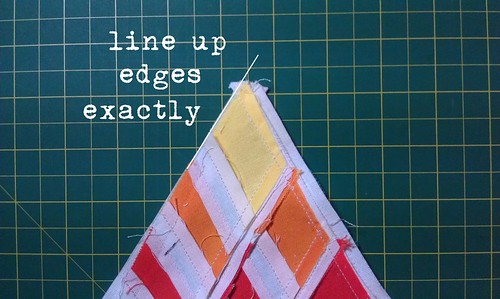
Special Techniques used: Y-seams, negative space quilting.
Quilted By: Sel @ Mad Quilter's Disease (a.k.a. me!)

Have you gone to check out the link-up at Amy's Creative Side?

Tuesday, July 5, 2016

Do I Know My Own Worth? Where The Rubber Hits The Road

So, you know about Hunter's Design Studio's We Are $ew Worth It theme, right? Or perhaps you know the concept of We Are $ew Worth It better for Molli Sparkles' post about No Value Does Not Equal Free, where he talks about the cost of making a quilt and does a very handy little spreadsheet to calculate it.

The rubber has just hit the road for me. A friend has offered to buy The Promises Of Spring since I mentioned in another blogpost that I was wondering what to do with it:

Promises of Spring

So, what is this quilt worth?

As noted in the post by Hunter's Design studio, this is an entirely different value to what I can get for it. I can do some rough maths to work out a value for the quilt, probably using Molli's template. However, the sale of the quilt poses a question about how I value myself - which, frankly, is the more challenging question. Numbers are easy; self-worth is difficult.

The question I have is how to approach this. Do I put out a spreadsheet laying out the price of the effort I put in (approximated because I didn't bother to record how long it took)? Do I just give her a number and wait for agreement or disagreement? Do I say "this is how much it cost me to make, this is what I'm happy to sell it for"? The friend is buying it for her daughter, and if she's not rolling in it, she's not destitute either.

I'm more than happy to gift a large portion of it - I've given quilts before and not said how much they cost; I've indicated how much quilts cost in casual conversation, but I've never had to have the conversation about how much my quilts are WORTH. And it's one thing to know that my 'hobby work' should be valued as much as my 'office work' (for which I am paid in easy excess of $50/hr) - certainly my 'hobby work' has brought considerably more pleasure to myself and others than my 'office work' tends to - and yet another to actually sit down and value my efforts.

It won't be easy. But maybe it's time.

Wednesday, June 25, 2014

WIP Wednesdays: the one damning the torpedoes


Racing towards the Quilt show!

Why is it that everything is always due ALL AT ONCE? I'm going to be binding quilts at Bible Study tonight, at a tea party on Saturday afternoon, and probably while watching my hockey club's D-grade team on Sunday (I'll be on the field for the A-grade game and padded up as goalie for the C-grade game).

Let's not even talk about labels and hanging sleeves. Oy.

WIPs

Show Quilts

Both are in variable states of binding, but they're looking pretty good!

Ready to go! #quilting #latergram

That's Mondrian Dreaming on the frame on Saturday.

Waiting to register for quiltcon...

And that's last night when I stayed up to register for QuiltCon. Alas, I suspect I borked something up in the rego with the MQG, because I didn't receive the email with the registration link. *sadface*

I think I'll just stick to the online classes and the tutorials, and do any local classes with designers that turn up in Australia. The Camille Roskelley class was great fun, and she was so sweet and lovely. And it's nice to meet up with other women who also love quilting!

On the plus side, not going to the US in January means I might be able to get to Europe next summer when a couple of friends will be over there working/travelling! And go to the US in September for Dragon*Con. With extra bonus cosplay?

Friendship Supernova Swap

Cutting and piecing is taking place! And laying out. I think I want more contrast, although not quite so vivid with the yellow, perhaps?

Deciding on the colour layout for the #supernovafriendship #blockswap. It's harder than it seems!

This block will be in the mail by the end of June, but probably not actually received until mid-July. I better write to my swap partner about that. And ask about her food allergies... *grin*

Rainbow Snowflakes

Yes, I've started another project. With teeny-tiny pieces (1" finished diamonds).

Remember the pattern I made for Madame Parfait's "Rainbow Blossom" block back in 2012? I called it the "Snowflake block" because I'm lazy like that (or possibly just Australian), and made a couple and stuffed them in a box somewhere.

I'm pulling the pattern out again. This time going scrappy.

DSC_1358

It's going to be a bit more difficult with individual scrappy pieces than it was strip-piecing, but I'm confident I can manage it. I'll be working with Michael Miller Cotton Coutere instead of Kona this time - the CC collection is a little thinner and finer than Kona, and will probably better for working with small pieces. (And I ordered major yardage from the Fat Quarter Shop.)

I think that's going to sit on the design wall for a week or two while I get everything else finished. Heck, I had that up pretty much the night I quilted Mondrian.

CAN'T STOP QUILTING. BEARS WILL EAT ME.

No Movement

- Passacaglia: lots of little pieces sewn, nothing worth taking photos. It doesn't help that I left my hand-piecing bag at bible study last Wednesday, and didn't get it back until church on Sunday night.

TO DO
- make labels and hanging sleeve for show quilts.
- mail the NSW Quilt Guild and tell them of the changes in name and quilt size for the show: still haven't done this
- six quilt backings and their tops to my quilter: still not done!

other things

My sister and I 'liberated' a slow-cooker from the parentals, who are cooking enthusiasts, and have the kitchen and appliances to prove it. (They're also retired and have the time to bake and cook and entertain to their hearts' content, which makes a difference.) My uncle also has a yen for cooking, and he bought a sous vide/slow cooker combination that he liked so much, he bought my parents one.

They already have a slow cooker. And a pressure cooker. And probably a sous vide tucked away in a cupboard somewhere. I wouldn't be surprised. So my sister asked if we could take the slow cooker/sous vide the uncle bought and the parentals said yes.

I may be on the way to addiction. Throw the ingredients together in the morning! Turn on the slow-cooker! Come home to a house that smells delicious and a dinner that tastes as good - if not more so!

IMG_20140621_090327

So far, I've made Pineapple Pork and Black Bean Beef. No, the alliteration wasn't intentional, it just happened that way. Recipes and finished pictures will follow, but they won't be, like, food blogger standard, because I can barely take decent photos of my quilting work, and photographing food levels up the difficulty by a thousand or something.

Anyway, how's your week been? Have you been productive? I'm linking up to Freshly Pieced's WIP Wednesday and anywhere else that I remember!

Wednesday, January 16, 2013

2012 recap: a big year

I’ve been a bit slow with this post – the recap of 2012 and the goals for 2013. Partly because I was away in Vietnam during that week when I usually do all my “past year, next year” organisation, and partly because my computer died at the start of December and I didn’t get around to replacing it until last week. I’ve been doing everything off my work computer which, while sturdy, makes me a bit antsy at times.

And it’s so much easier to 'do' than to 'recap'!

I'd have done a collage of my projects, only I don't have the time right now.

My goals for 2012 were:

  1. Finish another 12 quilt tops.
  2. Make at least 1 quilt from go to whoa - including the quilting stage, which I usually fob off to someone else.
  3. Start making quilts and patterns with an intent to sell.

My results for 2012 were:

  1. Not quite. My excuse is that we were doing kitchen renovations from February until August, and I had no sewing space because the kitchen essentially got moved into my sewing room.
  2. Yes! The Eternity Quilt. Designed, cut, pieced, quilted, and bound by me!
  3. Well, I did some quilt block patterns but they were nothing special. I'm not sure I'm cut out for the 'making patterns to sell' angle - it's not my focus, although I might still make some quilts to sell in future.

2012 Works

California Girl: A very quick project that turned out rather nice. More pastels than I like, but it'll be to someone's taste, I'm sure! (And the photography doesn't help.)

California girl quilt

Charmed Prints: A quilt-along with Anne-Marie of Gen X Quilters.

Charmed Prints top finished!

HST Harvest: Using up the FQs of a "harvest themed" fabric collection I bought four years ago and which I don't like anymore. (The colours are Not My Thing at all!)

HST Harvest

Floating Wildflowers: For the wedding of a friend in April. Another fabric collection I bought four years ago and hadn't yet used. I like this one better - the dark jewel tones, the design - much more to my tastes!

floating wildflowers: quilted

New York Beauty Blocks: Was to be for a huge NYB quilt-along, but I didn't like the colours I chose. I worked in mostly-solid or monochrome batiks and it just didn't work for me. So I'll make a small hanging from this and do a fullsize (or bigger size) quilt in some other fabric collection.

New York beauty

Nobody Puts Baby In The Corner - Scrap Attack: Definitely a pattern to do again in future - love the scrappiness, and the off-white 'backing'. It would be interesting to do this with a layer cake (or jelly roll) and a background fabric...

Nobody Puts Baby In The Corner!

Azerbaijani scarf for Eurovision: For my friend's Eurovision party back in May!

Azerbaijani scarf

Two baby quilts: a commission by a friend for her nephew and niece.

Baby quilts: #2 bound
Baby quilts: #1 bound

mug rug: Part of a mug-rug exchange. Only mine was a bit large - it's more of a soup-bowl rug!

Mug rug:  front

Heirloom: I was trying to do this in the manner of a quilt I saw online, but I think that one was more of a 'coins' style design, which makes a difference - this design is a little too rich for my eye.

Heirloom colours

Build Me Up Buttercup: I love the fabric, but I don't think the design quite hits me. Yellow (it's actually 'Kona Daffodil' not 'Kona Buttercup' but the name stuck) is not my favourite of colours - I prefer it as an accent, not a theme.

Build me up buttercup

Snowflake block: My first block tutorial! Design is by Madame Parfait, but she never posted the tutorial. This one's a bit rough, and I really need to make a whole quiltload. Perhaps in 2013?

snowflakeblock

Stepdad’s Cushions: Commissioned by my mum for the stepdad, oh, two years ago. Finally finished this year. Along with her quilt. They now sit in pride of place on their bed.

parental quilt projects

Batman block: A block tutorial for the Wicked! bloghop in October 2013. I need to use this block - perhaps in a cushion cover?

Wicked: Bat Logo Block

Eternity: My 2013 nemesis, dreamed up for a church project and completed in a ridiculously short time given its complexity level. Four months from inception to completion, and I did every inch of it, from design to cutting to piecing to quilting.

Material Obsession's Swap Day: the Eternity Quilt, finished and hung.

So that’s 2012, done and dusted!

Up next, 2013 goals.

Wednesday, August 29, 2012

WIP Wednesday: The One With Quite A Variety Of Stuff

WIP Wednesday at Freshly Pieced

I didn't get my WIP Wednesday in last week - too many things going on, too much happening, not enough time to write up a post.

This week, things are no less crazy, but I'm a little better prepared. :D

Finished

The Snowflake Block Tutorial!

Design by Madame Parfait
Tutorial by Sel @ The Mad Quilter

snowflakeblock

I really have to make an entire quilt out of these. They may be tricksy fiddly to make, but they really are stunners.

My Sewing Space!

I finally have a sewing desk with the ironing board right beside me! I have a cutting table with lots of light! A fabric stash! A haberdashery and 'other things' space!

And...*drum roll*...a design wall!

Design board

Not a lot of space on it, so I'll have to be judicious about what goes up there. And it needs better stapling down along the top and sides and bottom. I ran out of staples along the way.

WIPs

Father's Day gift for Stepfather

My mum asked me to make a couple of body pillow covers for the stepdad a couple of years ago. ...and I only just started on them in the last week.

Stepdad pillow covers

The goal is to have them done for Father's Day on Sunday. (In Australia, Father's Day is in September, which I rather like.) Although, technically, our Father's Day celebration will be on Saturday since it's easier on our schedules.

Stepdad pillow covers

I'm not convinced of the triangles as a suitable block to work with the flowers-and-fans. I borrowed a Marti Mitchell quilt template off Penny Poppleton (and had to return it so she could get her Modern Patchwork "Honey" quilt for Greta's Handcraft Centre done before Saturday!) Maybe they should have been smaller? *grimace* I hate the indecision of making something like this.

Still deciding about whether I want to quilt it or not... And then there's the question: to add a ruffle, or not to add a ruffle?

The Stash

Sorting, arranging, displaying...

Hauling out the stash

By colour...

FQs by colour

And collection...

Reece Scannell

Oh! And look what arrived this week: Mendocino Mermaids!

Mendocino mermaids

I blame Penny and Pinky for introducing me to Mendocino Mermaids. Yes. Yes, I do.

I think these will be used a la Quilting Modern's "To The Point" quilt. Because that's a wonderful, effective way to work with scraps.

Other Things

sydmodquiltguild

The first meeting of the North and Eastern Sydney MQG was small and intimate and cheerful.

Sydney MQG

But there are big things moving in the works. Big Things!

There's another sew-in this Friday night, City Extra, Circular Quay, from 5pm. If you’re in the area, we'd love to see you there.

And that's it from me. What about you? Don't forget to head over to the linky party and leave your links, check out what other people are working on, and comment for the love!

Saturday, August 25, 2012

Snowflake Block: Part 3 - Putting It All Together

Tutorial for the Snowflake Block
(a.k.a. Rainbow Blossom block)
Designed by Madame Parfait
Tutorial by Sel @ Mad Quilter's Disease

snowflakeblock

Master Post
Part 1 | Part 2 | Part 3
--

I apologise for the lateness of this tutorial - I know I said I'd post it on Monday, but I spent the weekend making up a second block to check my instructions and it completely fell apart. However, I had no more time to spend to unpick and remake it on the weekend, and the week has been pretty hectic until now! Thanks for bearing with me!

Part 3 Assembling the Block

At the end of the last section, you should've been left with the 6 segments for your snowflake block.

IMAG1280

We're going to attach three together for one half, three together for the other half, and then join the two.

Lay out the pieces in formation, as in the pic above.

Take one of the remaining ¾" strip and lay the bottom centre piece, and the bottom left piece and lay them on top, lining up the edges. Pin and sew.

IMAG1374

Do the same with the top centre piece and the top right piece.

Press seams towards the white fabric.

IMAG1404

Now, this is where things get a little tricky! We actually want the finished points of the triangle segments to be a bit up or down from each other, which complicates things. I originally designated ⅛", but you might have to do a bit of eyeballing here!

IMAG1405

You may also want the unpicker handy! (I certainly needed it: if some of the pics show a row of needleholes...uh, yeah, that's when I had to unpick it all and redo it.)

Take the bottom centre piece and the bottom left pieces, and lay them exactly over each other, good sides together.

IMAG1407

Line up the sides perfectly:

IMAG1408

Now, move the top piece down and to the right (the direction of the arrow) so that the right edges of the segments remain aligned, but the left edges have a ⅛" gap:

IMAG1409

Sew the right-side (aligned) edges together. Press the seams towards the white.

Ideally, if your seams are accurate, the 'branches' off the middle stripe should be at the same level.

IMAG1410

As you can tell, my seams are not terribly accurate!

Attaching the bottom left segment is much the same process.

IMAG1411

Line up the left side edges and more or less line up the right side with the edge of the white divider stripe. (I say 'more or less' because my segment doesn't have a perfectly straight edge.)

IMAG1412

Now move the top piece up and to the right (the direction of the arrow) so that the left edges of the segments remain aligned, but the right edges have a ⅛" gap. It will be harder to see the ⅛" because the line of the divider stripe on the bottom piece will be hidden under the top piece.

IMAG1413

Sew the left-side (aligned) edges together and press seams towards the white.

Now you have half a hexagon!

IMAG1414

Repeat the process for the three 'top' pieces of the block: simply rotate them so they're now the 'bottom' pieces (points facing up).

Take the remaining ¾" strip, line up one of the half-hexagons along the edge, sew, and press the seam towards the white.

IMAG1415

Take the half-hexagon without the strip, lay it on top of the half-hexagon with the strip, and check that the points are more or less vertically in line with each other. Sew, and press seam to the white.

IMAG1416

TA-DA! We're done! One snowflake block, all stunning and ready to go in your next quilt!

IMAG1419

Madame Parfait actually made it a square block by adding extra white fabric around the edges, and that's certainly an option. However, I rather like it as a hexagonal block - imagine a whole quilt of these!

You could certainly ‘production line’ quite a few of these if you got yourself organised. I might try it someday when I have a bit more time than right now!

--

I hope that my directions have been clear - if you have any questions, please don't hesitate to ask!

Finally, I've created a Flickr group for all blocks and quilts made from my tutorials. (Okay, so I only have the one at present, but I'm working on it!)